Master the art of organizing, reusing and uploading photos and videos in Squarespace
Squarespace recently launched an Asset Library for images and videos which makes it so easy to streamline our image organization. No more uploading 10 of the same photo or video again!
In dealing with my web design clients through my Design Day service, I have found that many of them are unaware of this feature and how awesome it is.
Let’s explore this asset library feature and help you get the most out of this tool by taking some simple steps with your images.
What is the Asset Library in Squarespace?
The Asset library is a panel in the back end of your Squarespace website that appears on the sidebar menu, near the bottom, when you are logged into your site. On this panel you will find all the images and videos you have already uploaded to your site. It also will show and free or licensed stock images you have added directly within Squarespace.

There are a couple of steps we can take first to not only make it easier to search for our photos, but to make our site quicker to load:
Preparing Your Photos for Your Squarespace Website
Before you upload your images to Squarespace it is beneficial to rename your images with descriptive, keyword-rich file names. This practice improves search engine optimization and makes it easier to find and manage your images within Squarespace.
So for instance, if you are a wedding photographer and you are uploading a session from a wedding event, you could rename your photos to include the name of Wedding venue and even a descriptive term. Including your brand name is also a great idea. In this case let’s, say we had a file called DSC99823.jpg. It could be renamed to Rosewood-elegant-winter-wedding-your brand name.jpg.
Second, optimize your images for web page loading speed and overall website performance. Ideally we want our images to be under 500KB in size. There are many tools you can use to do this such as tinyjpg.com and more. Read my blog post for more information on how to compress your images for your Squarespace website.
Organizing Your Photos in Squarespace 7.1 Using the Asset Library
Once your images or videos are ready to go, it’s time to upload them to Squarespace. The Asset Library in Squarespace 7.1 makes it easy to manage the photos on your website.
To find your Asset Library, log into your Squarespace website. On the menu in the bottom options you will see “Asset Library”. Click on this to view your photos that have been uploaded on your site.
All your photos will appear without any organization structure. We can begin to organize photos by creating folders.
Why use folders in your Asset Library?
You might have hundreds of images in your Asset library and being able to find them can take a lot of time and frustration. Especially if they have not been renamed. Then there is no easy way to search if they have not been renamed.
So every time you add an image element on a web page you might end up just reloading the image from your computer and then you have so many multiples of the same photo. Or else you spend time paging through hundreds of images. We don’t need to waste our time like that!
Instead, with renaming your photos and using folders we can quickly locate previously uploaded images when we add an image block on our website.
How to create a folder in your Asset Library in Squarespace 7.1
At the top right of your asset library you will see a button to “Add New”. When we choose this option, we can either create a new folder or upload images.
Let’s start by adding a new folder. You will be prompted to give your folder a name. Once you have entered in the folder title click “Create”.

Now we have a folder that we can move photos into. As of this post, there is not a way to move photos and create a new folder at the same time so you will need to create a folder prior to moving photos. For now it is a 2 step process.
Continue on creating any folders you may want to have. Some ideas for folder organization would be:
stock photos
brand photos
blog post assets
brand marks and logos
portfolio items
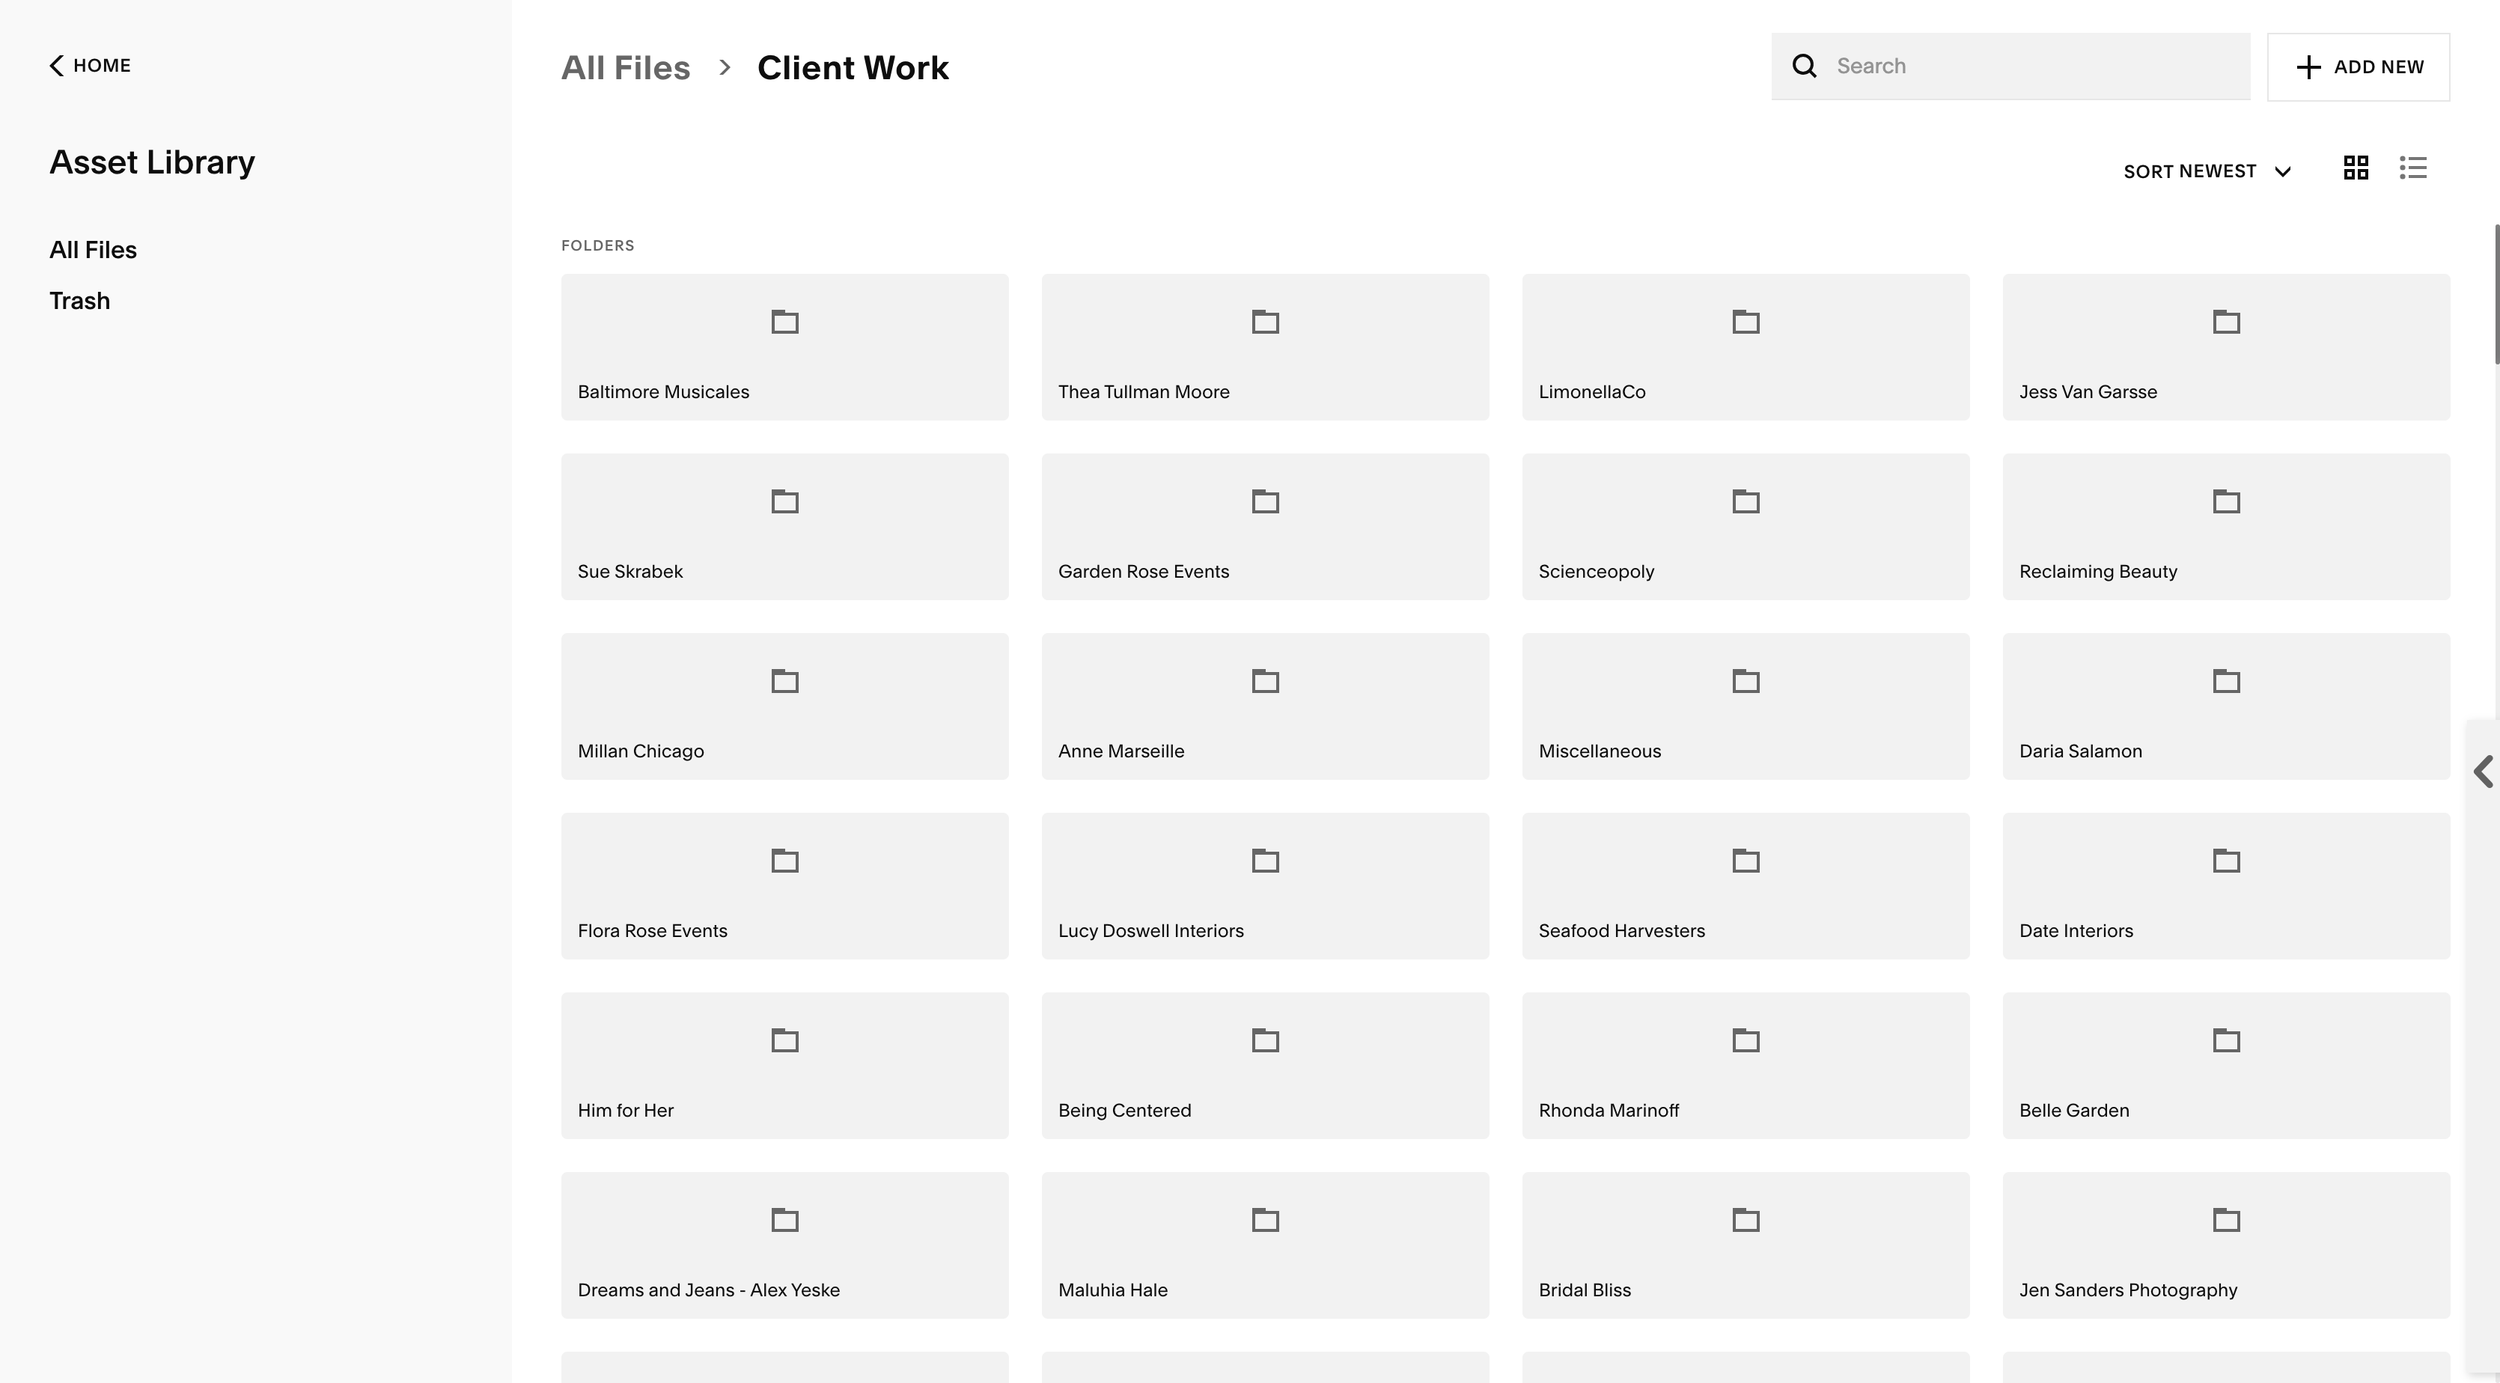
To further organize your folders, you can use nested folders to create further breakdowns in a category. So for instance, if you have a portfolio that you would like to organize you could create a high level Portfolio folder and then within that folder you could create a folder for each portfolio group.
For example, in my asset library I have a folder titled “Client Work”. Within that folder I have a folder for each client with examples of the work I have done:
Now that we have created our folder structure in the asset library we can start moving or uploading photos into the right spot. This will make it easier to locate specific images quickly.
How to move previously uploaded images to a folder in your Asset Library in Squarespace
Since this is a new feature, for most of us we will just have a huge amount of photos which are unorganized in the back end of our Squarespace website. To move these images to one of the folders you have already created (in the previous step) follow these steps:
Select each photo you want to move (or delete) by clicking on the white box in the top left of each photo. Tip: to select a large contiguous grouping of photos click on the first photo and then Cmd-Shift +click on the last photo.
On the floating menu near the bottom, click on the folder icon to begin the process of moving the photos. (If you want to delete them, click on the trash can icon.)
On the pop up menu, navigate to the folder that you want to move the image to. If it will be going to a nested folder, choose the top folder and then keep selecting the nested folder within that one until you reach the correct location.
Click on “Move here”
How to upload photos directly into the Squarespace Asset Library
The benefit of uploading directly to the Asset Library is that we can organize our photos right away.
Your first step will be to create a folder if it does not already exist. Then navigate to the folder that the images will belong to and select “Add New” → Upload Files. On the pop up menu you will see your computer files and folders. You bulk select photos to upload any at all once or just select one. (Remember to rename and compress your photos before uploading!)
Tips on finding your photos in the Asset Library
To find photos quickly, use the search function. Remember that pre-naming your images with relevant, descriptive names can make this process faster.

When you are in list view, you’ll be able to see more information about your images, including the date uploaded, file name, size, and dimensions.
Whether you are in list or grid view you can also see more information about your photo by clicking on the three dots next to the image. This will show more specifications, including the dimensions and file size.

When you are in list view you can click on a column at the top to sort by that element.

How to delete images from your Squarespace website
When you are in the Asset Library panel, you can select one or more images and then click on the trash can option that appears on the floating menu near the bottom. You will receive a prompt to make sure you want to delete it and if the image is being used on the website you will see a message warning you about that. If you delete an image that was currently displayed on your website then there will just be an empty spot where it was before.
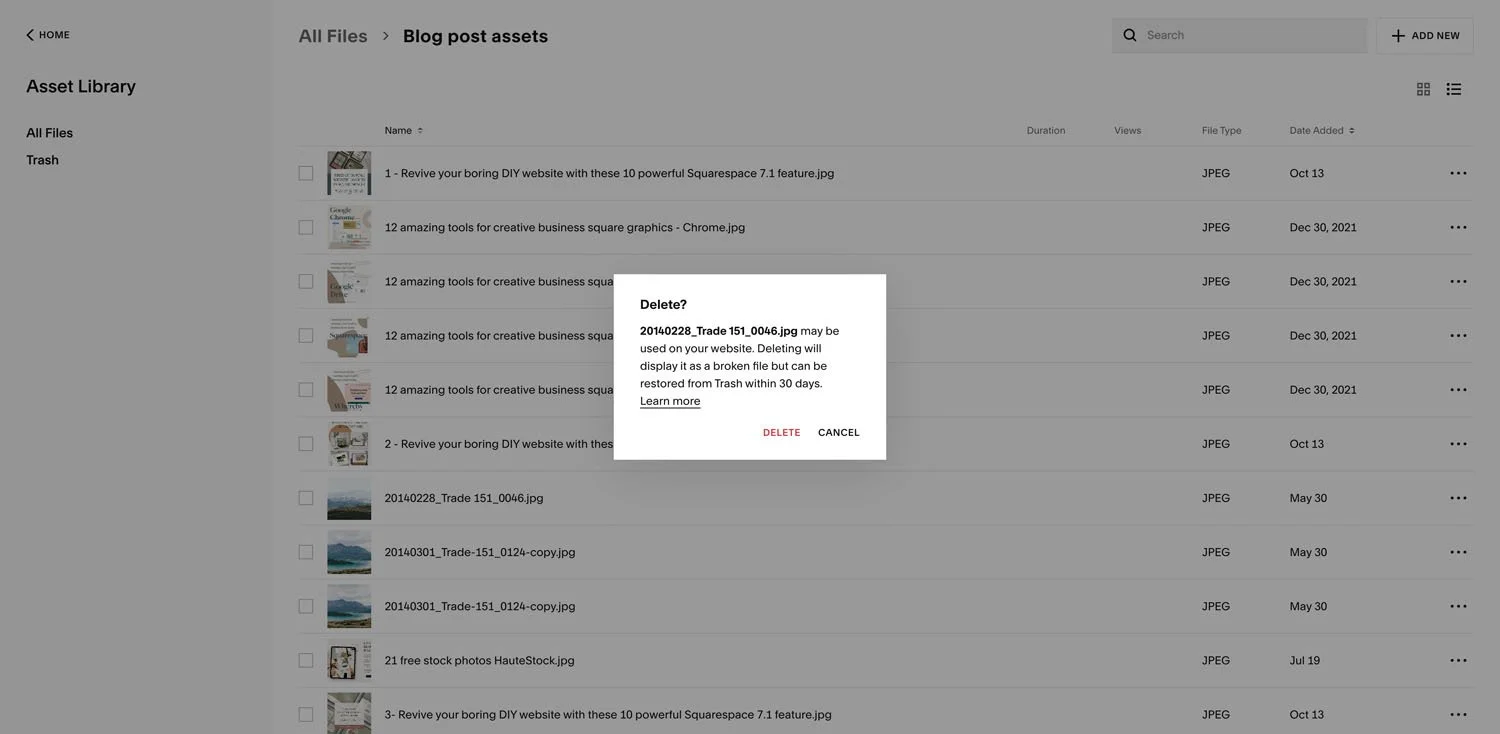
Deleted images are stored in the trash folder for 30 days, providing ample time to restore them as needed.
To restore an image select “Trash” in the side panel of the Asset Library and then select any images you want to restore and click on the rotating arrows symbol in the floating menu at the bottom:

If you get frustrated by not being able to find images on your Squarespace website, or having duplicates of so many photos using the Asset Library is your answer to organization bliss of your website images!
Not only can we stay organized, but we can find out information about our images such as the file name and size of the image that helps us in accessing our photos.
Pin it for later