
How to add Related Posts in Squarespace automatically and manually
*this post contains some affiliate links which means I may receive a small commission for any purchases you make at no additional cost to you. Always remember that I will never share or promote a tool or resource that I don't use and love myself.
When someone has landed on a blog post on your website it is cause for celebration. All your hard work in generating website traffic has paid off. So don’t let them get to the end of your blog post and just leave!
One way to keep visitors interested in your website content is to add a Related Posts options at the end of your blog posts which will encourage your visitors to explore other posts on your site that will likely be relevant and helpful to them as well.
For other ways to keep your blog visitors on your website check out the post 7 ways to turn blog visitors into customers.
In Squarespace there are 2 ways to add Related Posts. One way is manual and free and the other is automatic, but uses a paid plugin. I will review both methods here to show you the options.
Adding Related Posts Manually
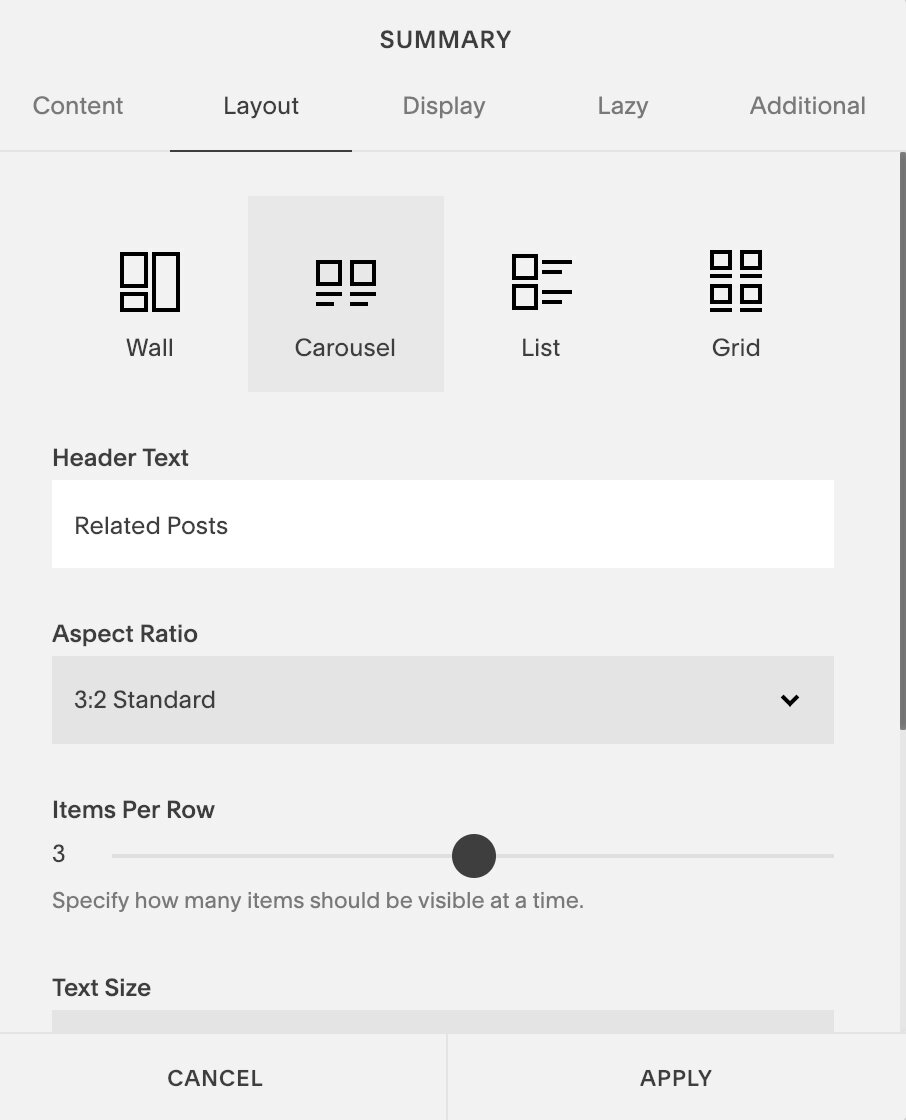
To add a carousel gallery of related posts, the best way is to go to the end of the blog post you would like to add it to and click on the insertion point. From here select “carousel” under the Summary section:


Next, on the Content tab, select the Blog page you are wanting to add the Related from:
(in this example our Blog is called “Blog”)
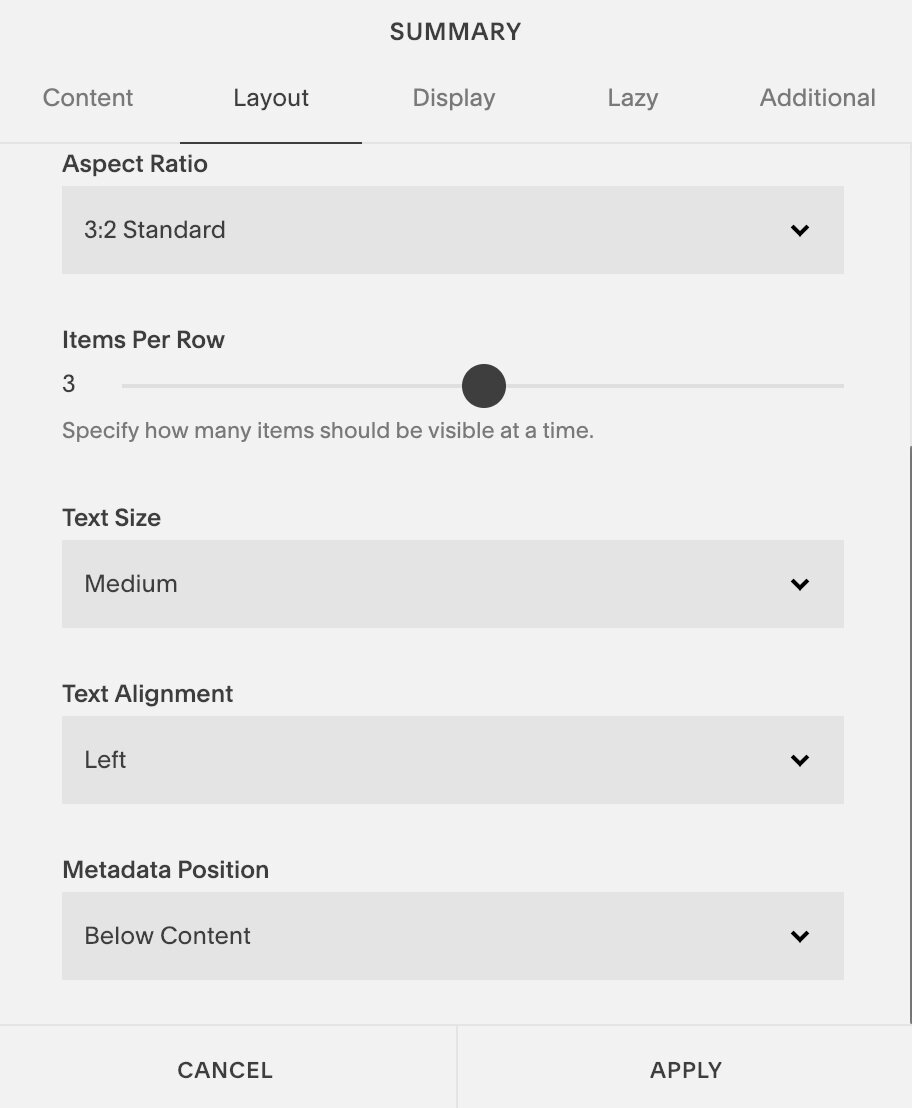
Next, go to the “Layout” panel and set the number of posts you want to display (3 is a good number). You can also change the heading that appear above the gallery (I changed it to “Related Posts”). I kept the aspect ratio to 3:2, but if you have square photos or vertical photos you can select a different option. I chose text size of “medium” and kept all other options the same.
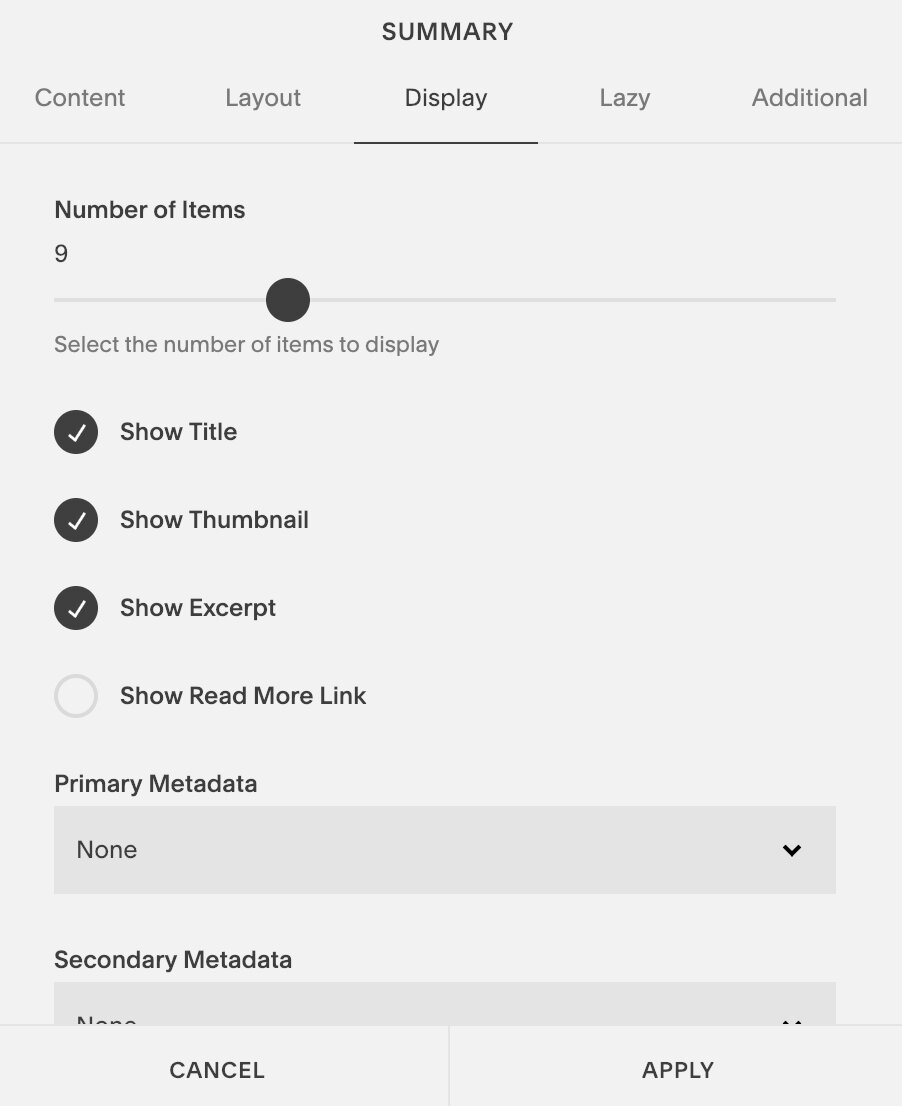
On the “Display” panel set the maximum number of posts you want to show (arrows will appear for users to scroll through the posts). The maximum number of posts you can show on Squarespace using a summary block is 30, but I would recommend 12 or less posts. Keep it to a multiple of the number of items per row. So in this case since we are showing 3 posts per row, I chose 9 posts.
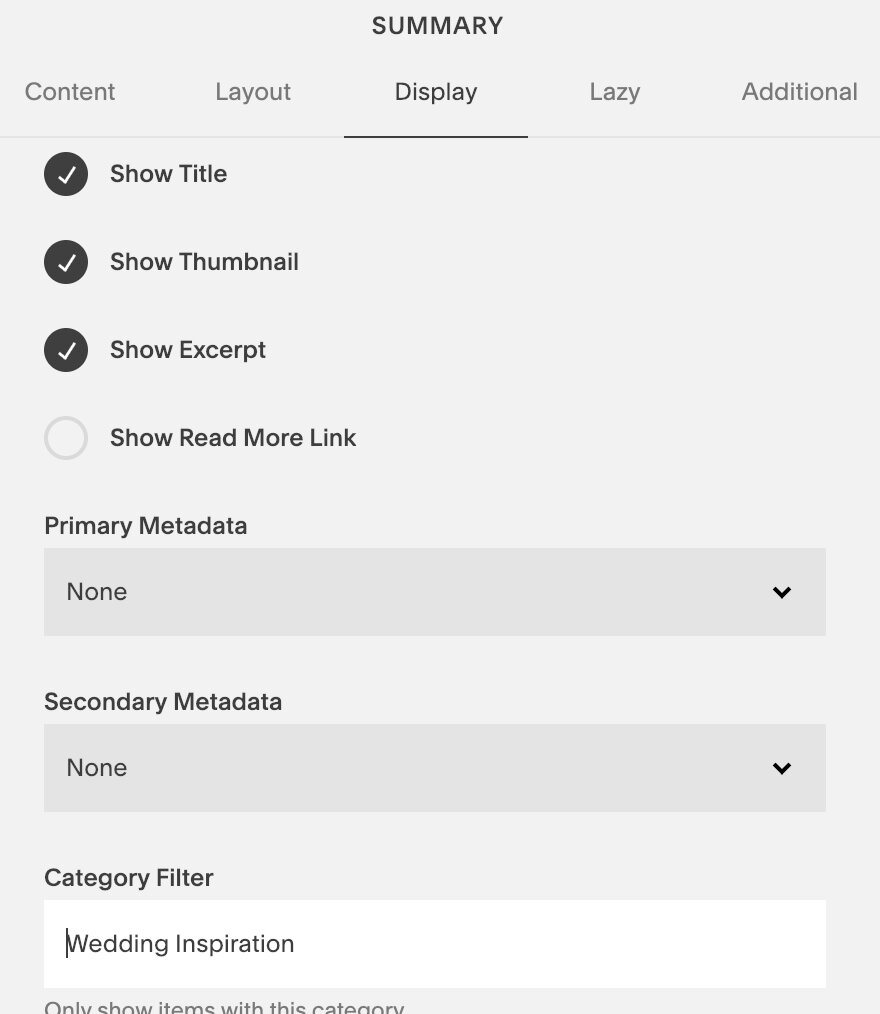
Check “Show Title” and “Show Thumbnail” and uncheck “Show Excerpt” and “Show Read More Link”. (unless that is something you want to display). I like to turn off the date as well so under “Primary Metadata” click the drop down menu and select “None”. These options create a clean looking display.
When you are happy with your sittings click “Apply”. Your related posts carousel will look something like this:
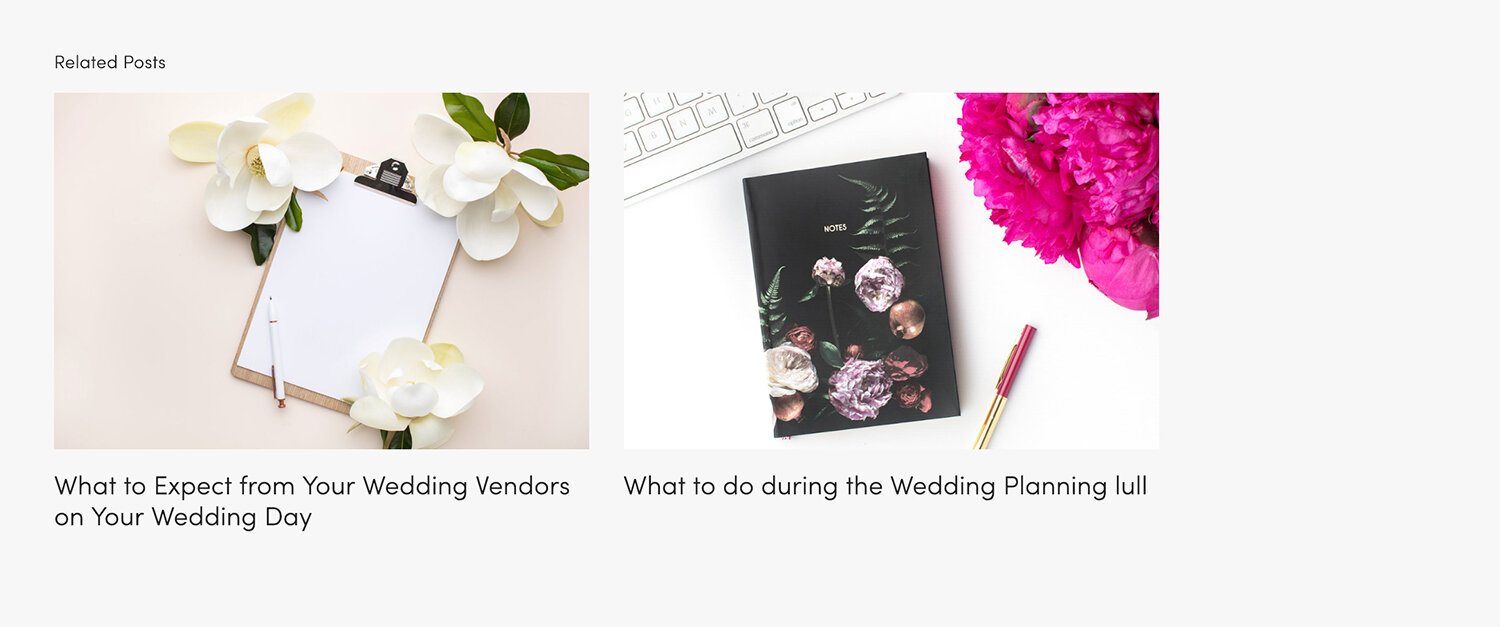
Since there were only 2 other posts with that category, that is all that is showing here.
So how do you add this to all of your blog posts? Well, going forward it is easier as you can create a blog post template in Squarespace with this summary carousel block already in it and then you can duplicate the template whenever you add a new blog post. Just make sure to change the category to the same category of the blog post you are adding.
To create a blog post template in Squarespace, create a new blog post as normal by selecting the “+” sign on the Blog page. Name your blog post something like “blog post template - copy and save”. Then follow the instructions above to add in your related posts carousel.
When you want to copy it, select the blog post template, and at the bottom of the panel select “duplicate”.
Select “duplicate” to copy the blog post template

Replace your blog post title with the correct blog post name and add in your blog post content above the Related Posts carousel gallery. Don’t forget to set your category name and on the options panel add a thumbnail image and ensure the URL has the correct name. You can also add an excerpt on this panel.
Unfortunately, there is no easy way to go back and add Related Posts to blog posts that have been previously published without using a purchased plugin.
How to add Related Posts automatically
Sometimes the right tools are worth the investment for the amount of time they save us. This is the case with the Squarespace plugins that are available. I own many for my own use and for my client websites. My favorite plugins come from SQSP Themes. I own quite a few of their plugins and their support is amazing!
The related posts plugins from SQSP Themes allows you to apply some settings, insert some code (following some clear directions) and the posts automatically appear at the bottom of your blog posts. You can even use this for products - not just posts! It also automatically scrolls through the carousel.

Sqspthemes Related Posts Plugin
When you download the plugin, you receive detailed instructions on how to set it up and there is even a demo video.
You can filter by category only, tag only and even select a random order! You can show any options you want such as the title, thumbnail, excerpt, metadata etc.
Once you have all you settings as you want them, follow the instructions to upload the 2 code files and add the code injections to the footer code injection. (Settings -> Advanced -> Code Injection)
Here is an example of the plugin in action:

One thing to note is that if you select to filter by category or tags and you do not have a category or tag set for the blog post OR you do not have any other blog posts with the same category or tag then you will just get a “Loading Related Posts” message where the related posts gallery should be.
The customer service for SQSPThemes is above par as well. Any time I have had a question or issue my email is addressed usually the same day and they are even willing to go onto the site in question and make and edits necessary.
In conclusion
There you have 2 different ways to add related posts to Squarespace. The manual method is obviously more time consuming, but easier to understand as there is less that can go wrong as there is no code injections or settings.
The second method is automatic and applies the change to all blog posts past and future, but does involve some comfort with injecting code.
Disclaimer: This post contains affiliate links which may reward me in the event that you make a purchase.
